Camtasia for macOS
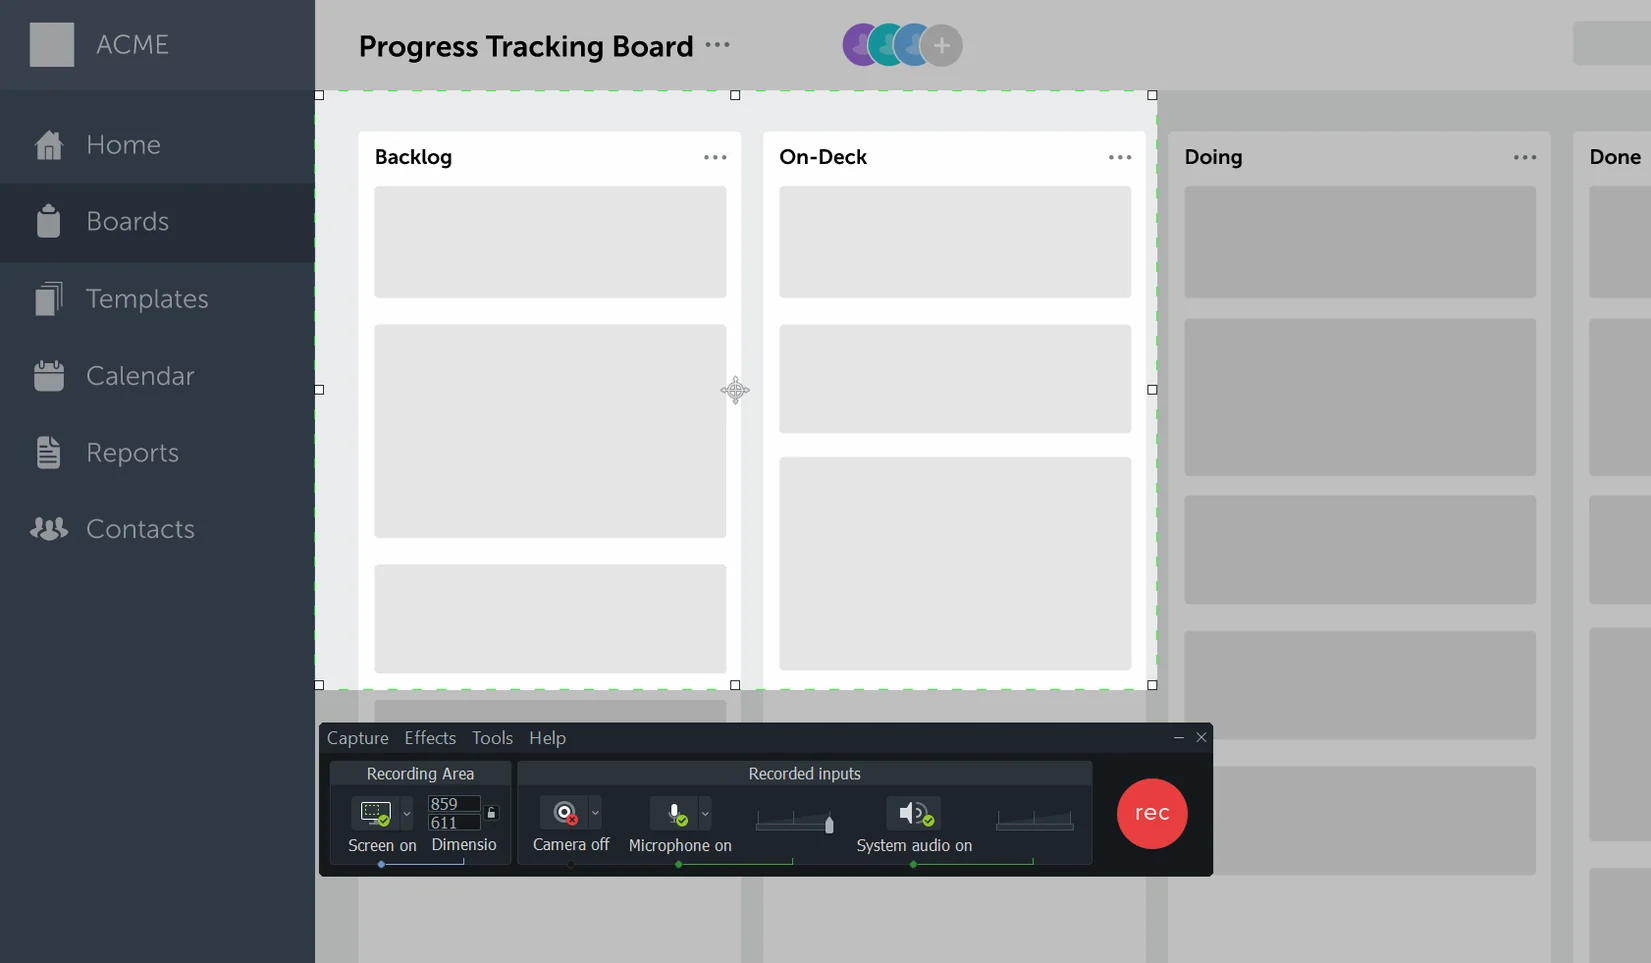
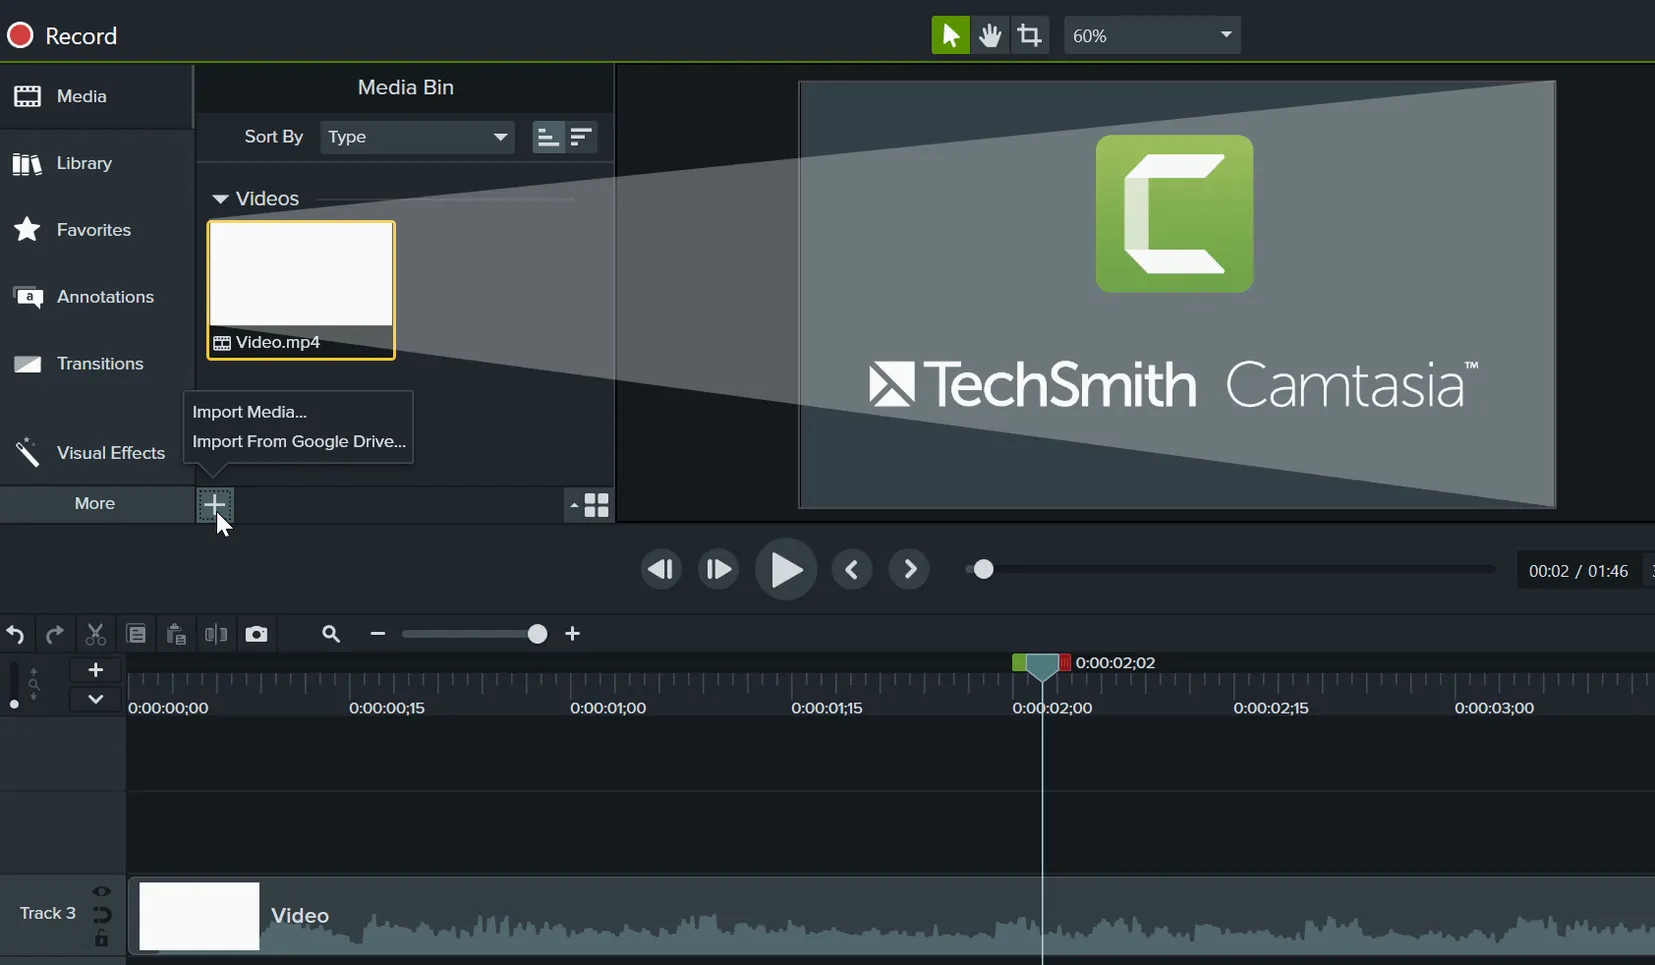
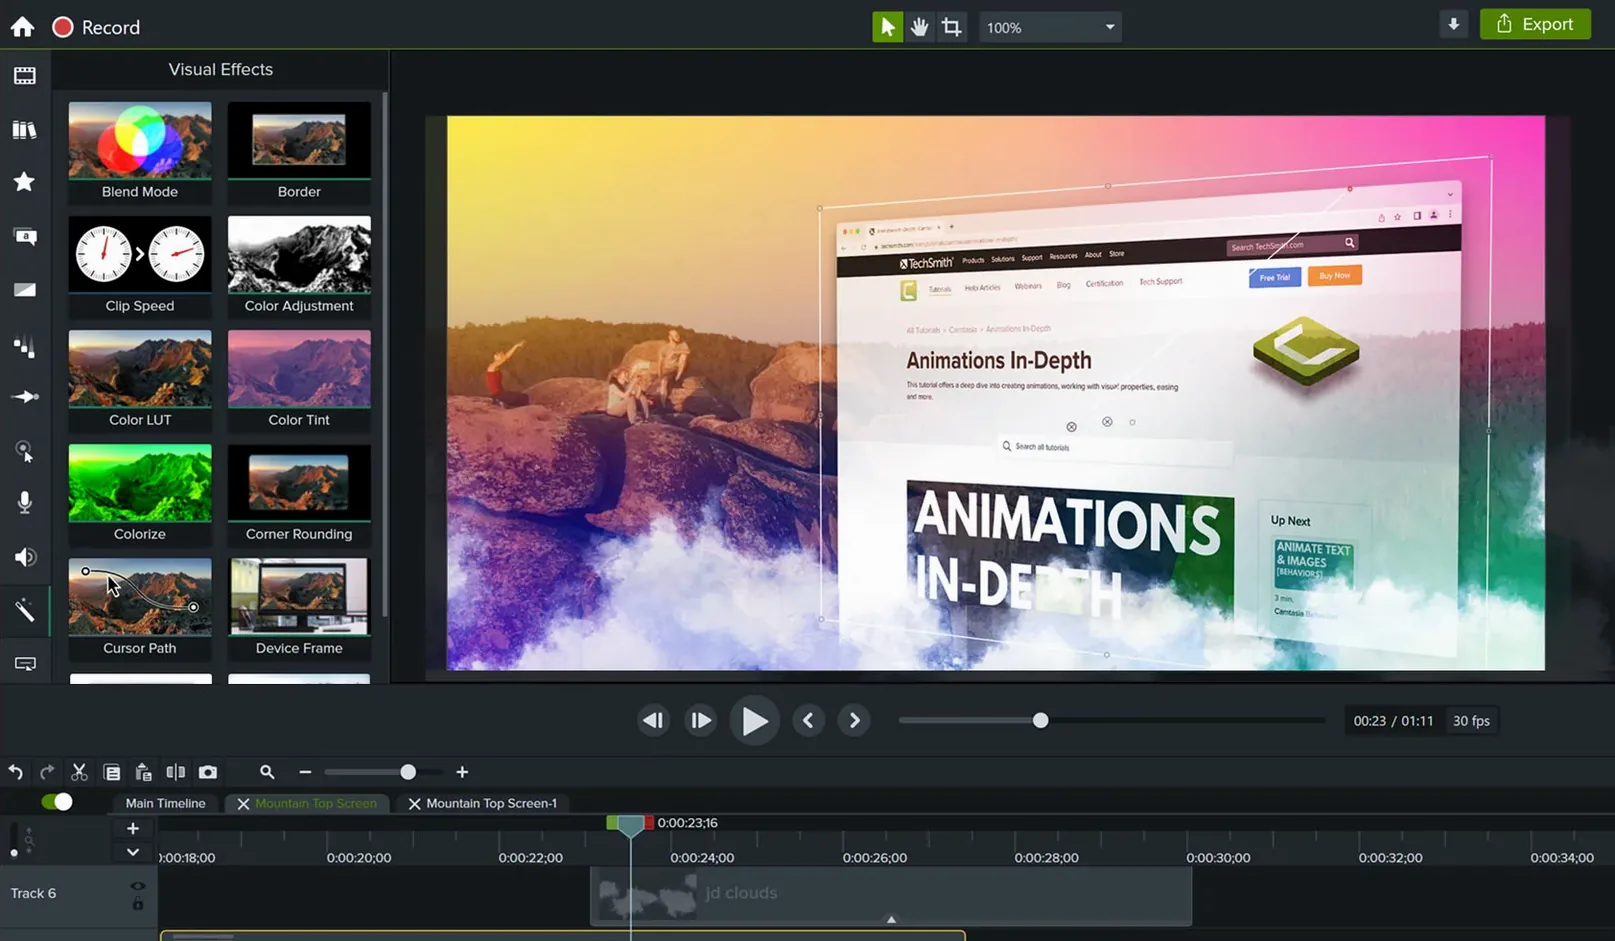
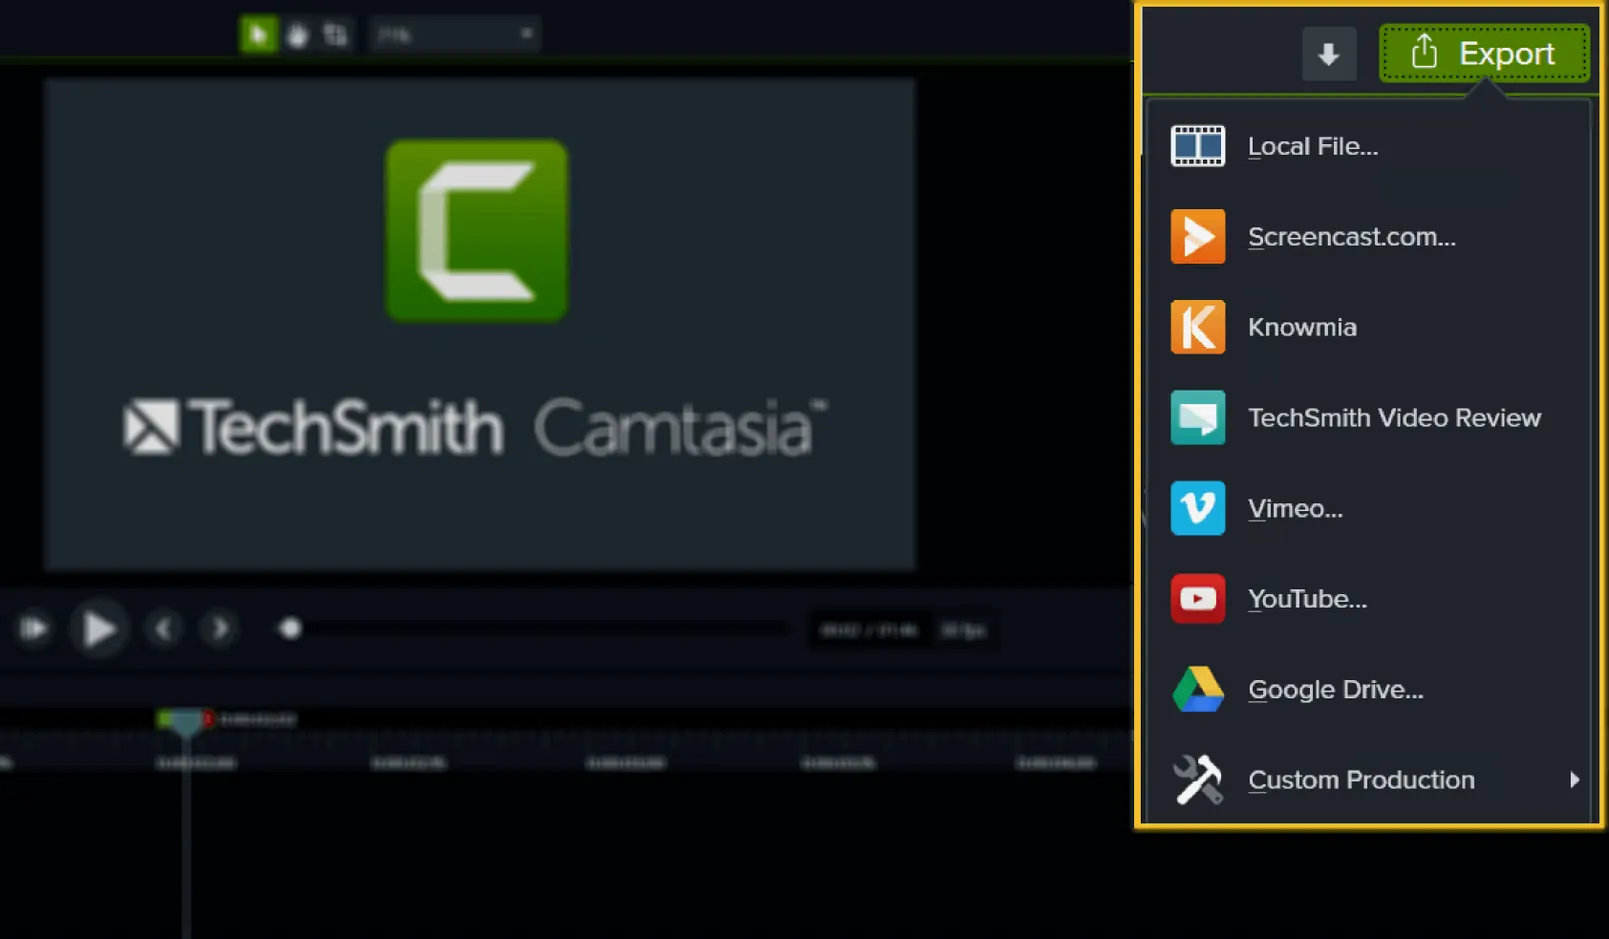
If you have used TechSmith's Snagit for quick captures, Camtasia is where that footage goes when a screenshot is not enough. It shares the same lineage but moves into timeline editing, callouts, and the kind of project work that an experienced user reaches for after the first take. The workflow below is the one I find most useful once a project has actual structure.
- Bring in existing recordings. Add video files you already have instead of recording everything again. Camtasia treats them as source clips on the timeline.
- Pull in a PowerPoint deck. If you present from PowerPoint, import the file and use the slides as visual anchors for the video.
- Apply a ready-made template. Pick a video template for the intro, lower thirds, or outro so the project looks consistent without building every element by hand.
- Use drag-and-drop effects. Drag transitions, animations, and behaviors onto clips directly in the editor.
- Export and share. Produce the final file and hand it off to other people from inside the app.
On the technical side, the current build runs on Apple Silicon and Intel Macs with macOS 13 or later. The interface switches between English, German, Spanish, Simplified Chinese, Portuguese, French, and Japanese. The 2026.2.3 release also fixes a crash that could appear during startup or export, which matters if you batch-render longer projects.
What should you tackle in the first few days?
When the .app bundle first lands in /Applications, resist the urge to record a full course on day one. Spend an afternoon with the timeline first. A short 60-second test video teaches you more than watching someone else's project file ever will.
- Learn the ripple delete. Select a clip segment, press
Shift-Delete, and watch the gap close. New users who drag clips manually to fill holes waste minutes per edit session. This single shortcut pays back the time you spend learning it within the first three projects. - Map the recording region to a fixed size. Instead of dragging the capture area by hand every time, save a custom preset at 1920×1080 or 1280×720. Consistent frame dimensions mean no rescaling gymnastics when you mix recordings later.
- Build one reusable library asset. Right-click any effect, annotation, or custom lower third you tweaked and choose "Add to Library." After five projects you will have a personal kit that speeds up assembly more than any template alone.
- Check the proxy setting. If you edit 4K screen recordings on an older Intel Mac, turning on proxy video under the preferences keeps playback smooth while you trim. The originals still get used at export, so you never sacrifice final quality.
Where Camtasia sits among your other apps
The software does not live in a vacuum. It talks to the rest of macOS, to your slide decks, and to TechSmith's own ecosystem in ways that shape how you build a project.
Snagit and the TechSmith family
If Snagit already lives on your Mac, Camtasia recognizes its capture library. You can drag .snagproj stills or short recordings straight onto the timeline without exporting intermediate files. The two apps share annotation styles, so text callouts and arrows from Snagit look identical once they land in a Camtasia project.
Keynote and PowerPoint
PowerPoint imports convert each slide into a separate media clip with transitions intact. For Keynote users, the route is slightly different: export slides as individual PNGs or a QuickTime movie, then bring those into the media bin. Camtasia does not natively parse .key files, but the extra export step takes under a minute.
macOS integration points
The app hooks into the standard share extensions, so the share sheet lists AirDrop, Messages, and Mail alongside the built-in export destinations. If you record system audio, Camtasia uses the same audio capture stack that QuickTime Player relies on, which means third-party audio routing apps like BlackHole or Loopback work as expected for isolating application sound.
A real workflow: producing a software tutorial from scratch
Here is how I would build a three-minute feature walkthrough — the kind you might find in a SaaS knowledge base — from blank canvas to rendered file.
- Plan the recording window. Open the target app, size its window to exactly 1440×900, and set the Camtasia capture region to match. Turn off desktop notifications and switch on Do Not Disturb so nothing pops over the interface mid-take.
- Record in sections. Instead of one long 15-minute capture, record each feature as a separate clip: opening a panel, filling a form, exporting a result. Pause between sections with
Command-Shift-2. Individual clips are easier to trim and reorder later. - Rough-cut on the timeline. Drag all clips to the timeline in order. Use the playhead and split tool (
Command-Shift-S) to remove dead air at the start and end of each segment. Do not touch effects yet — just get the sequence right. - Add cursor effects. Select the screen recording track, open the cursor properties, and swap the default pointer for the magnified highlight style. Keyframe the cursor path to slow down at important clicks so viewers can follow the action.
- Layer annotations. Drag callouts from the annotations panel onto new tracks above the recording. Time each annotation to appear one second before the action it describes, then fade it out with a quick dissolve. A track for text, one for arrows, one for highlights — the layer stack keeps things editable without hunting through a single flat track.
- Record voiceover last. With the visual edit locked, open the voice narration panel and read through the script while watching the timeline. Camtasia drops the recording onto its own audio track. Trim pauses, apply a gentle noise removal from the audio effects panel, and render.
This order — visuals first, audio last — avoids the headache of re-timing narration every time you trim a clip.
Recorded at Retina resolution but playback looks tiny?
- Recording at the wrong resolution. Some people capture a full Retina display at native resolution and end up with a 3072×1920 recording that looks tiny when played back at 1080p. Set the canvas dimensions first, then scale the recording to match. Camtasia gives you a "Resize to Canvas" option in the clip context menu for exactly this fix.
- Stacking too many tracks without naming them. After tracks 4 and 5 hold different callout layers, it becomes impossible to tell which is which by sight alone. Double-click a track header and type a short label — "arrows," "text overlays," "background music." Ten seconds of naming saves ten minutes of soloing tracks later.
- Ignoring the audio waveform. New editors line up clips by eye instead of expanding the waveform and aligning peaks to the grid. When you sync a screen action to a spoken cue, that visual mismatch gets obvious fast. Zoom into the waveform with
Command-=and nudge the clip until the transient lines up. - Exporting with the wrong codec for the destination. The default H.264 preset works for most platforms, but if the final video goes to a site that re-encodes aggressively, a higher-bitrate ProRes export handed off to a dedicated compressor often survives the platform's compression with fewer artifacts. Camtasia's export dialog gives you both options; pick based on where the file goes next, not just what renders fastest.
Software trainers living inside the screen recorder?
Three groups get an outsized return from Camtasia on a Mac, and the reasons are specific to how they work.
Software trainers and customer education teams live inside the screen recorder. They need cursor highlighting, keyboard shortcut overlays, and the ability to swap out a UI recording when the product updates without rebuilding the entire voiceover track. The track-based editor and separate media bin make that surgical replacement possible — drop in the new screen capture, trim to fit, and leave the audio untouched.
Course creators who teach from slide decks value the PowerPoint import because it preserves slide timing and transitions as editable clips. Instead of screen-recording a presentation as it plays, they bring the source file directly onto the timeline and narrate around it. Each slide becomes an object that can hold additional annotations, zoom-and-pan keyframes, or embedded video inserts.
Hybrid presenters who mix recorded demos with talking-head video lean on Camtasia's picture-in-picture and green-screen tools. They record the webcam alongside the screen, then composite the speaker into a corner of the demo. The same project can output a full 1080p version for a learning management system and a cropped square version for social media — two export presets, one timeline.
If your daily work involves showing other people what happens on a screen — and you need to edit that down to something clear and repeatable — Camtasia fits the slot that a general-purpose video editor was never really designed to fill.
Camtasia 2026.2.4 resolves several recent issues and applies targeted stability work to the timeline and export modules.
- macOS 13 (Ventura) or later
- Apple Silicon or Intel 64-bit Mac
$ man camtasia | grep -A2 "?"
Does Camtasia run on both Apple Silicon and Intel Macs?
Yes. The current version supports both architectures on macOS 13 and later.
Can I import PowerPoint presentations into Camtasia?
Yes. Camtasia can import PowerPoint files and use the slides as part of a video project.
Which interface languages are available?
The app interface is available in English, German, Spanish, Simplified Chinese, Portuguese, French, and Japanese.
Comments 0
Sign in or create an account to leave a comment.
No comments yet. A codec, a slice, a machine — they appear after moderation.