DaVinci Resolve Studio for macOS
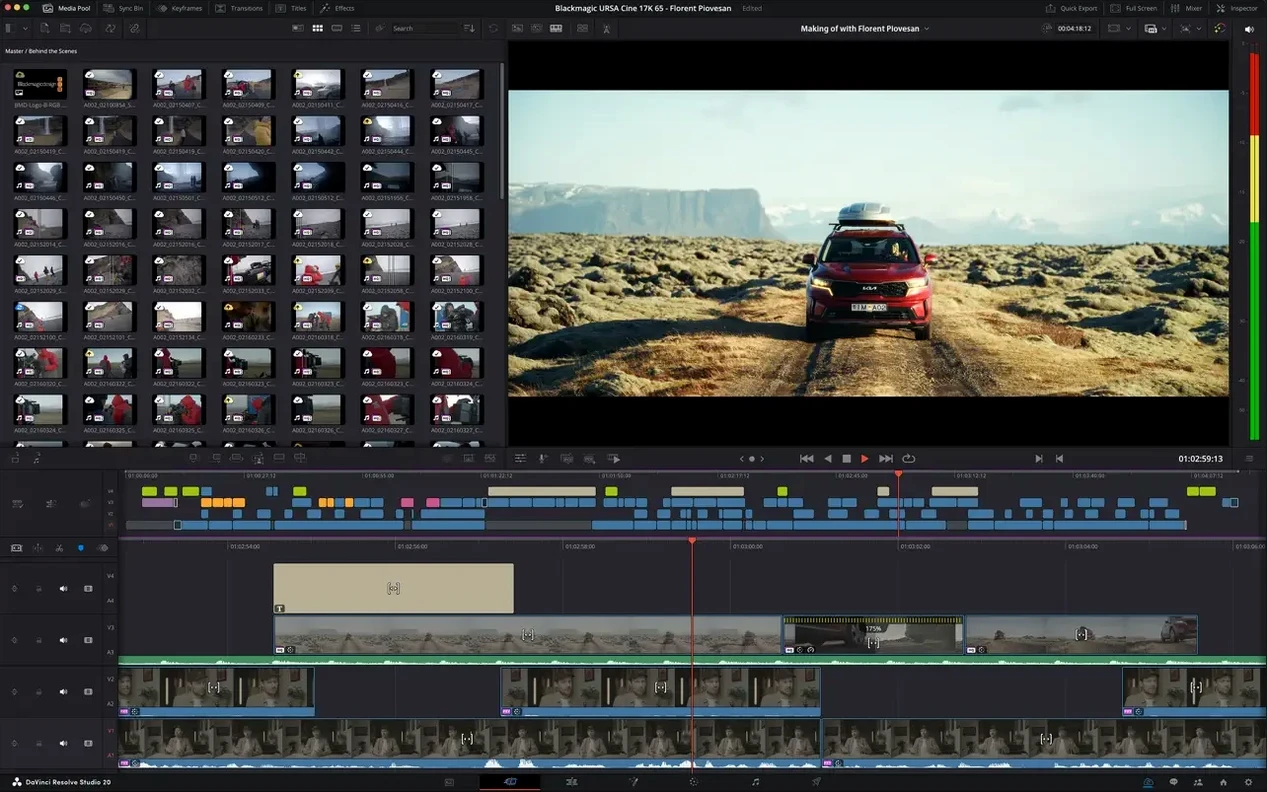
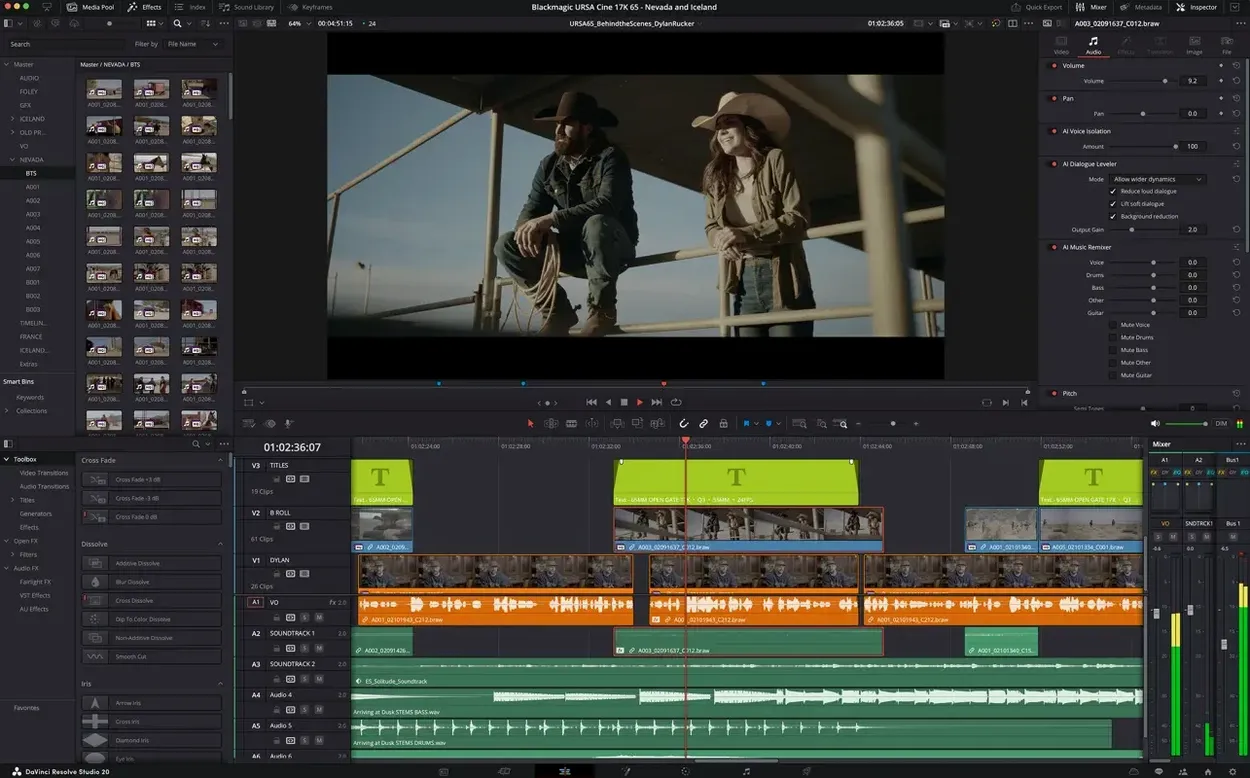
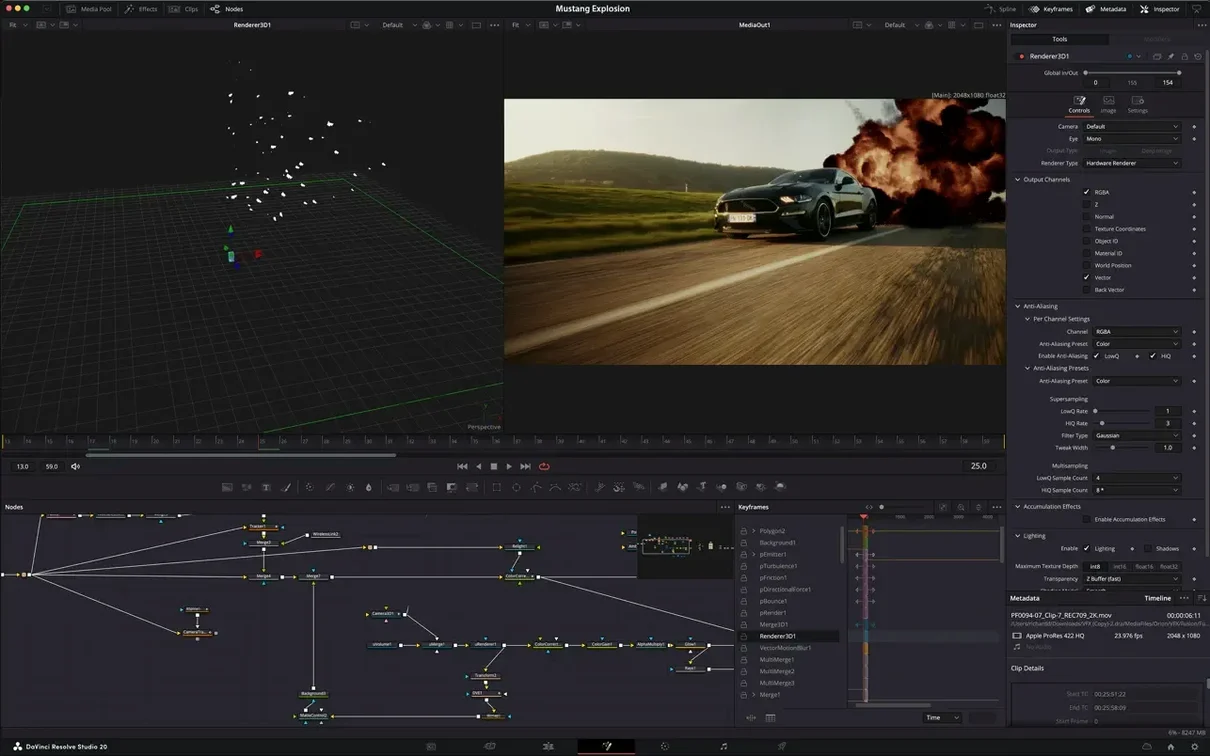
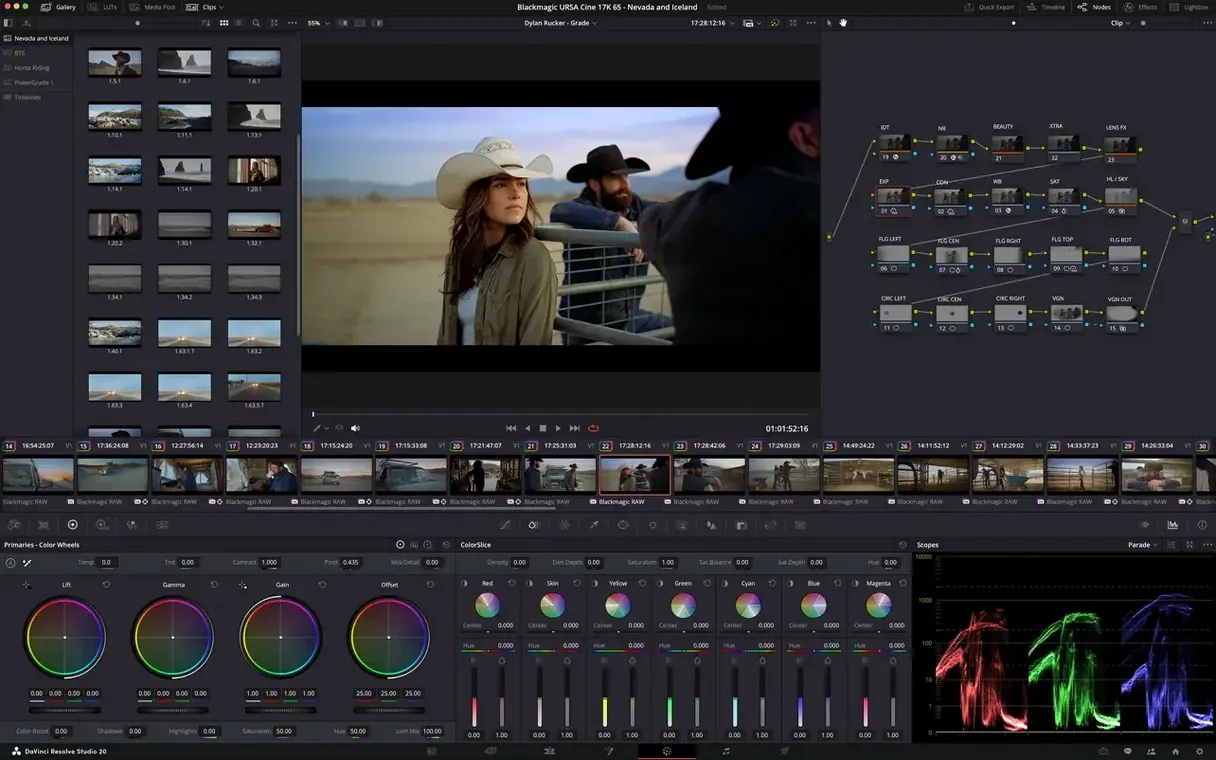
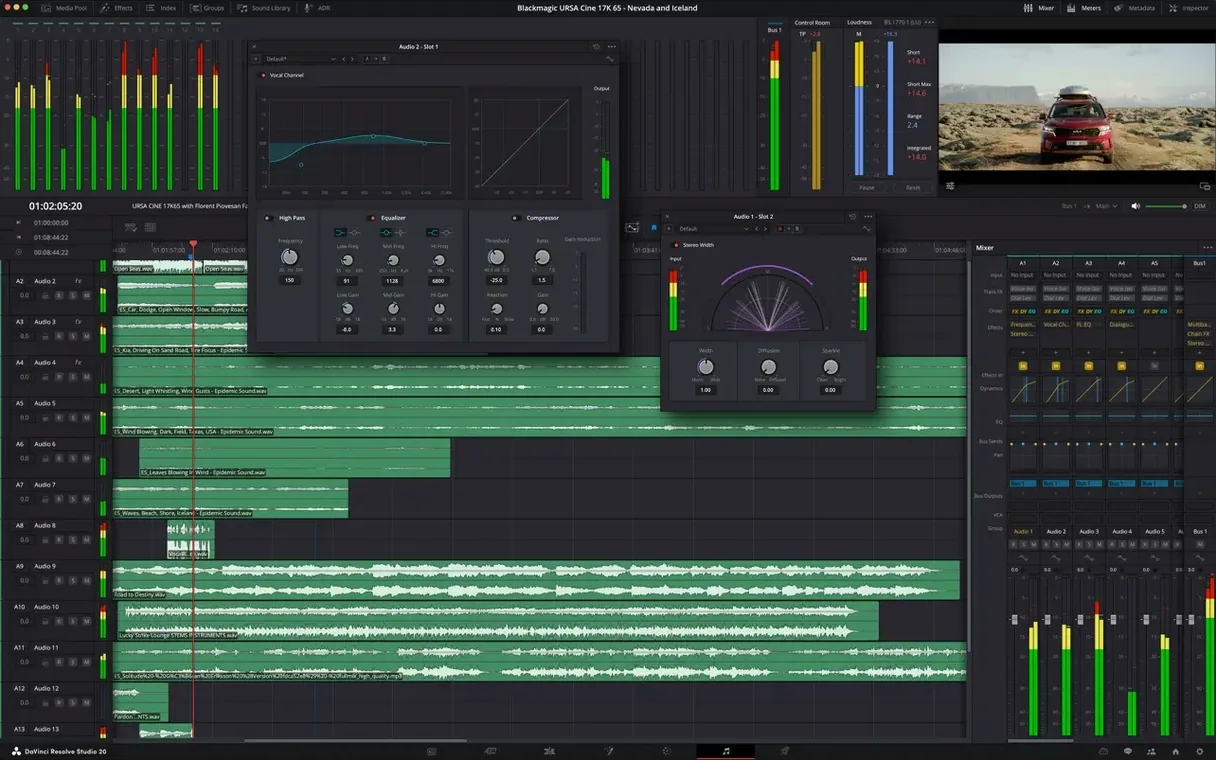
32-bit floating-point YRGB color processing sits under every pixel you push around. That is the first number worth knowing, because it means you can pull a highlight two stops down and push shadows back up without the image falling apart. Here is a sensible first-project sequence to get your bearings.
- Set up a project and timeline. Open the Project Manager, create a new project and drop a few clips into the Media Pool. Right-click, choose Create New Timeline and pick a resolution that matches your footage.
- Move to the Cut page. This is the fast rough-assembly space. Drag clips into the timeline, trim with the blade tool and get the story order right before you worry about anything else.
- Jump to the Color page. Grab a node and add a serial corrector. Pull up the parade scope and balance blacks, then whites. Try the HDR palette — the app reads HDR10+ and Dolby Vision metadata natively, so you are already working in a real HDR pipeline if your footage supports it.
- Add one Fusion effect. Open the Fusion page, drop a
Backgroundnode, pipe it into aText+node and merge it over your clip. That tiny comp teaches you the node flow without leaving the application. - Finish on Fairlight. Hop to the Fairlight page, add a track and pull a cross-fade between two audio clips. The whole signal path runs at 32-bit float, so clipping is almost impossible to print.
That loop — Cut, Color, Fusion, Fairlight — is the heart of it. You never bounce between separate apps. The 21.1 release also brings GPU-accelerated Kakadu HTJ2K decoding for cinema workflows, so high-bitrate JPEG 2000 files scrub smoothly even on a MacBook Pro.
How does a Blackmagic 6K and iPhone ProRes timeline come together?
Let me walk you through a morning with a real project. A filmmaker friend sends over a short interview shot on a Blackmagic Pocket Cinema Camera 6K, plus some b‑roll captured on an iPhone in Apple ProRes. The files land in a shared folder. I drag the whole folder into the Media Pool on the Media page. The bins populate instantly, and because version 21.1 added hardware‑accelerated HEIC decoding on Apple Silicon, even the stills grabbed as reference frames pop open without a pause.
First stop is the Cut page. I scrub through the interview, drop markers on the answers that feel right, and build a rough string‑out in under ten minutes. The source tape mode lets me view all clips as one continuous reel, so I never open a single clip in isolation — I just play down the whole interview and pull selects with the I and O keys. The timeline grows fast. When the structure holds, I switch to the Edit page for fine trimming. The trim tools here are precise down to the sub‑frame; holding Shift while nudging a cut slips the edit point in the viewer without touching the timeline length.
Before coffee gets cold I move to the Color page. The interview was shot in natural light, so the skin tones drift a little across takes. I group the interview clips, grab the qualifier, and isolate the skin. A gentle hue‑vs‑hue curve pulls everything back toward a warm, consistent tone. The HDR scopes on a second display show nothing clipping, and the YRGB 32‑bit pipeline means the grade stays clean even when I push the background exposure down two stops. That grade gets copied across all interview shots with a middle‑click in the gallery.
By midday the timeline has a simple Fusion title, a few Fairlight cross‑fades, and a color‑corrected master. I render an H.265 master for review straight from the Deliver page — the hardware encoder on Apple Silicon chews through it quickly. The whole session stayed inside one application.
Which Finder and Quick Look tricks speed up real work?
DaVinci Resolve Studio does not live in a bubble. On macOS it plays well with the Finder, Quick Look, and other media apps in ways that speed up real work.
Drop a .drp project file onto the Resolve icon in the Dock and it opens directly to that project. Right‑click any video file in the Finder and choose Open With — Resolve will launch and add it to the current Media Pool bin. The app registers as a handler for common formats, so you can send a clip from Apple Photos or the Preview app straight into a timeline without manually importing.
On the audio side, Fairlight can send and receive tracks with other DAWs via Blackmagic’s audio bridge. If a sound designer works in Logic Pro, I can route a stereo mix out of Fairlight, into Logic, and back without rendering a single intermediate file. The Fairlight page also talks to any Core Audio interface — my little USB preamp shows up in the patch panel the moment I plug it in.
For color, the app reads LUTs in .cube and .3dl format from any folder. I keep a shared LUT folder inside an iCloud Drive directory, and any new look file I drop there appears in Resolve’s LUT browser after a quick refresh. The gallery stills save as .drx files, portable enough to email to a colorist working on a different machine.
macOS ColorSync means the viewer preview matches my display profile without extra configuration. When I connect a reference monitor through a Blackmagic DeckLink or UltraStudio box, Resolve bypasses the OS color management entirely and drives the display directly — exactly what you want for grading.
Can the AI assistant sort a messy bin by scene or camera?
The update touched places you notice after a week, not after reading a changelog. The AI assistant integration is the headliner: ask it to organize a messy bin by scene or camera, and it tags and sorts faster than I can by hand. Batch rendering gets the same treatment — describe the output format and destination in plain language, and the assistant builds the render preset. It is not a gimmick; it saves clicks when you are juggling multiple deliverables.
The Photo page now reads more camera raw formats. I can pull stills from a Sony or Canon body, browse them alongside video clips, and even apply the same color science that the Cinema Camera line uses. For a shoot that mixes stills and video, that is a quiet but significant improvement — one less round‑trip to another app.
The Krokodove tools, all 25‑plus of them, land straight into the Fusion page. These are node‑based utilities for motion graphics: shape generators, particle helpers, text effects that go beyond the built‑in Text+ node. If you build lower‑thirds or animated bumpers, you will find yourself reaching for them within the first edit session after updating.
On the scripting side, 21.1 opens up 20 new APIs with a console built right in. I can write a quick Lua or Python script to rename timeline markers, adjust clip volume in bulk, or export a custom EDL without leaving the app. That console lowers the barrier from “I should automate this” to “I just automated this in four lines.”
GPU‑accelerated Kakadu HTJ2K decoding changes scrubbing performance on cinema‑sized JPEG 2000 frames. On my M2 machine, a 4K DCI timeline that used to stutter on complex dissolves now rolls smoothly. That alone makes the update worth the install for anyone handling DCP‑adjacent material.
What does a delivery workflow look like, end to end?
Let’s run a specific task: delivering a 4K master and a social cut from the same timeline. I have a graded interview, a few b‑roll shots, a stereo mix, and client approval on the edit.
On the Deliver page, I start with the 4K master. I choose H.265 Master from the presets, set resolution to 3840×2160, and pick a data rate that suits the final destination — say 80 Mb/s for an archival copy. Under Advanced Settings I enable Render at Maximum Bit Depth and check Use Hardware Acceleration. The encoding taps into Apple’s media engine, so the render speed stays high.
Next, the social cut. I need a 1080×1920 vertical version. Instead of duplicating the timeline and re‑editing, I create a new timeline, drop the master sequence inside as a nested clip, and use the Smart Reframe tool on the Inspector. It analyzes the frame and keeps the speaker centered as the shot moves. I tweak a couple of keyframes, add a burned‑in caption track, and head back to the Deliver page. This time I pick H.264 at 15 Mb/s and set the output resolution to 1080×1920.
Both jobs go into the render queue. I hit Render All, walk away, and come back to two files in the output folder. The whole process, from edit‑locked timeline to two finished deliverables, runs inside Resolve without an external encoder or cropping tool.
What are the small things people miss?
Some of the best features sit in plain sight but never get clicked. Here are a few worth knowing.
- Middle‑click to copy grades. On the Color page, middle‑click any thumbnail in the gallery and it transfers the grade to the current clip. No right‑click menus, no dragging.
- Shift‑F to full‑screen viewer. Works on the Cut, Edit, and Color pages. A single key toggles the viewer to fill the display, which is invaluable for checking focus or fine detail on a laptop screen.
- Alt‑drag to swap nodes. In Fusion, hold Option and drag one node over another. They swap places in the flow without breaking connections. That saves a lot of rewiring when you re‑order effects.
- Timeline comparison mode. On the Color page, enable Split Screen and choose Selected Still. You can drag a wipe across the viewer to compare your current grade against any saved still. The wipe follows your cursor position in real time.
- Fairlight fader shortcuts. Hold Option while dragging a fader to move it in finer increments. Double‑click any fader to return it to unity gain.
- Node labels. Right‑click a node and pick Label. Call it something human — “skin fix”, “exterior LUT”, “sharpening”. Six months later you will still understand the grade tree at a glance.
- Quick export button. On the Edit page toolbar, a small rocket icon sends the current timeline straight to the Deliver presets. One click bypasses the page switch entirely for simple renders.
These little accelerators add up. After a week of deliberate practice they become muscle memory, and that is when the app starts to feel transparent.
- macOS 15 or later
- Apple Silicon or Intel 64-bit
$ man davinci-resolve-studio | grep -A2 "?"
What HDR formats does it handle?
DaVinci Resolve Studio works natively with HDR10+ and Dolby Vision metadata, letting you grade and deliver in real HDR on a compatible display.
Why does Hollywood use this instead of other editors?
The 32-bit float YRGB processing, integrated Fusion VFX and Fairlight audio mean a full theatrical pipeline runs inside one application without round-tripping.
Comments 0
Sign in or create an account to leave a comment.
No comments yet. A codec, a slice, a machine — they appear after moderation.