Disk Drill for macOS
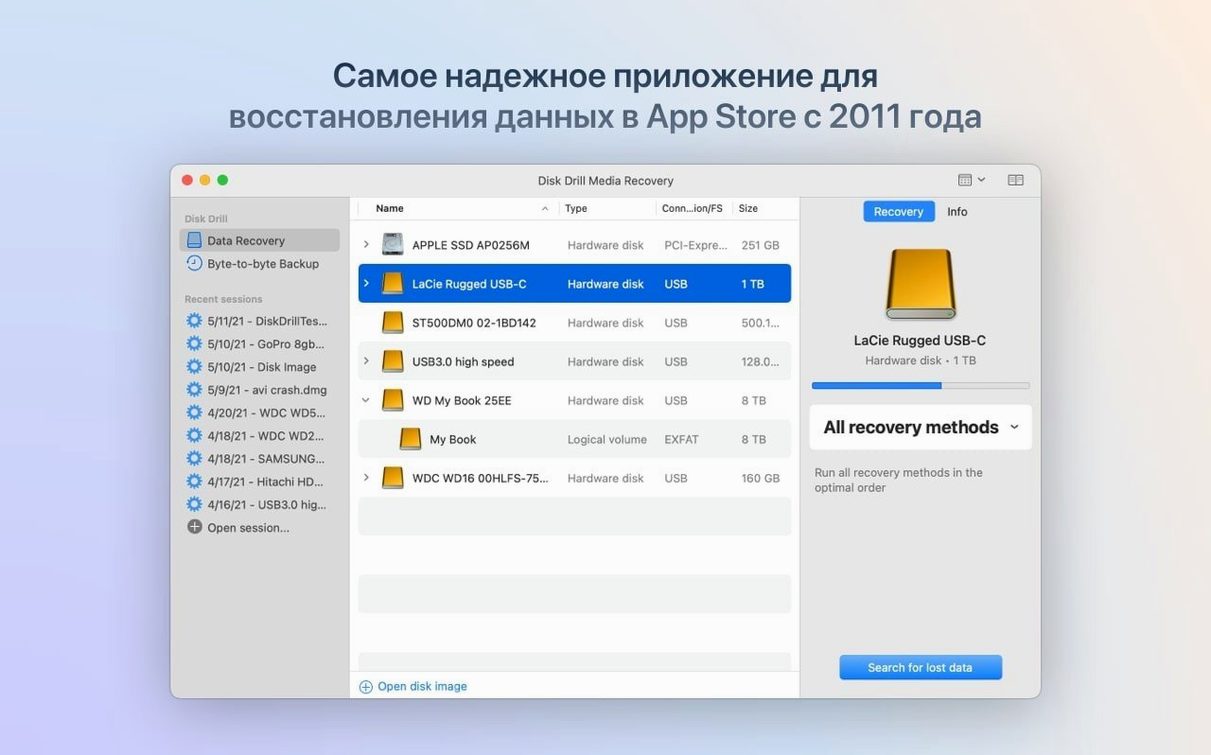
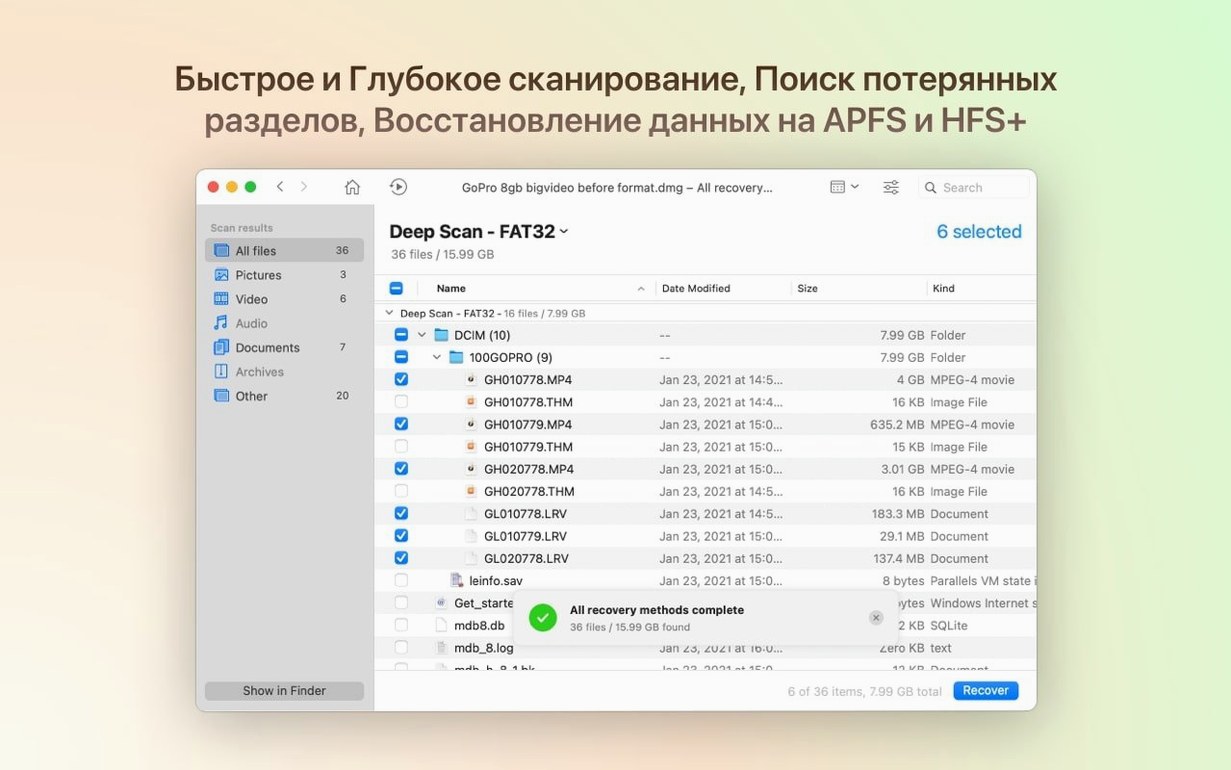
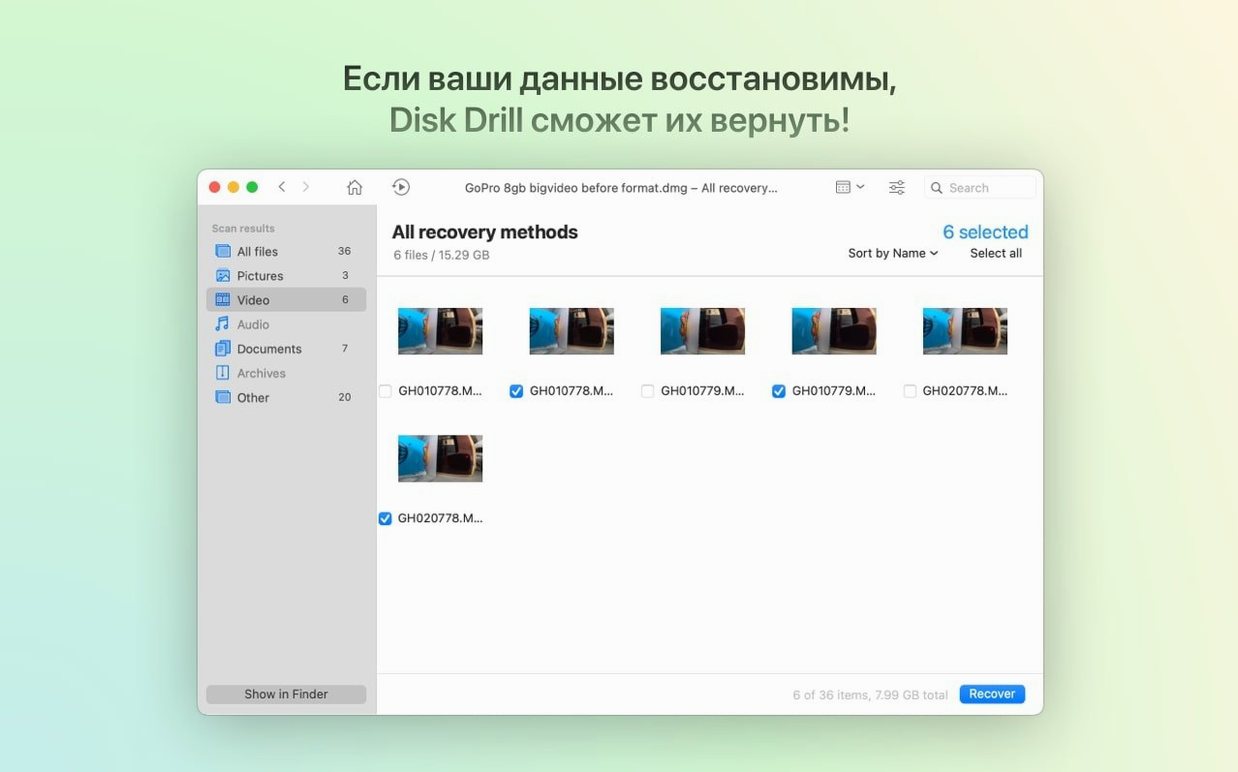
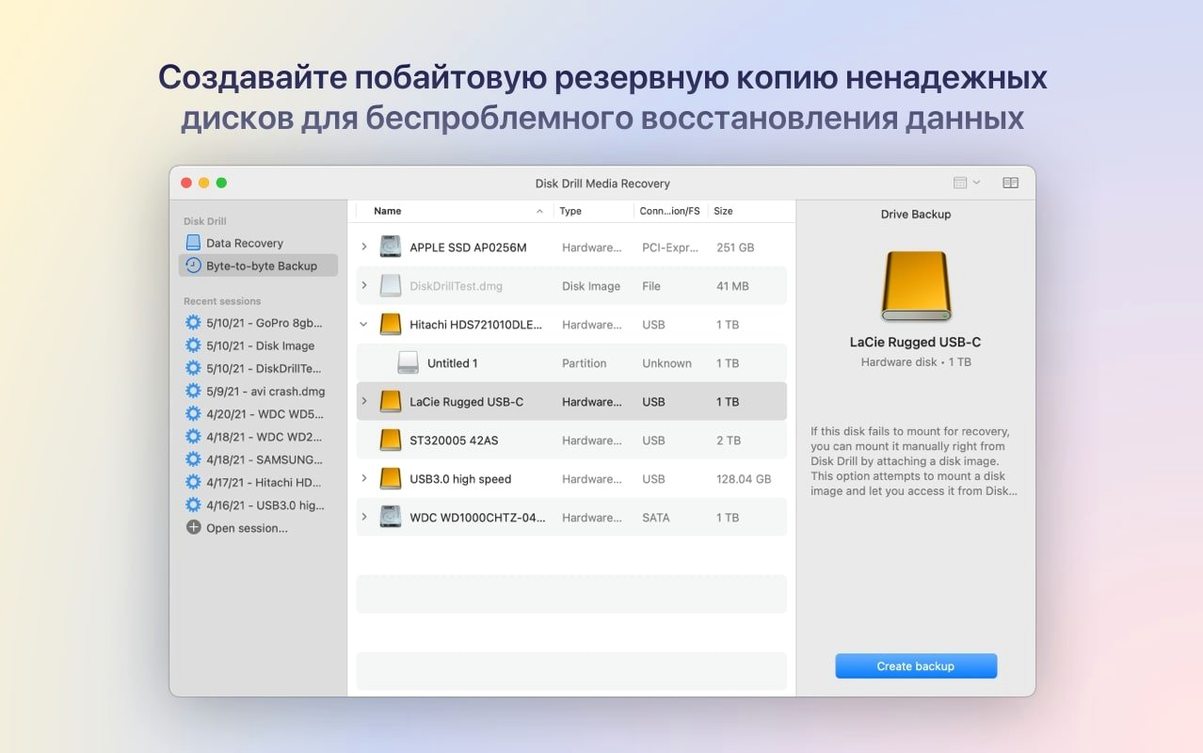
If you have used Apple's built-in Disk Utility, Disk Drill sits a few layers above it. Disk Utility manages volumes and formats them; Disk Drill goes looking for what a format or deletion left behind. It scans internal drives, external enclosures, cameras, USB sticks, memory cards, and a range of mobile devices, then reconstructs files it can identify. The latest build, 6.3.2326, also detects lost BitLocker partitions and handles encrypted APFS volumes better than earlier releases.
Recover from formatted drives, Androids, and Kindles
- Recovering photos, videos, and documents from formatted or unreadable devices, including Android phones and Kindle readers.
- Previewing files before you commit to a recovery, which helps when a volume holds thousands of recoverable items.
- Restoring iPhone and iPad data such as call history, contacts, and messages.
- Working with newer file types, including
.p8,.pfx,.m4a, and.rwlfiles.
Stop writing to the device the moment data goes missing
- Recovery works best when you stop writing to the affected device as soon as you notice data loss.
- Some formats and partition types are recoverable in principle, but results depend on how much new data has overwritten the old sectors.
- Mobile-device recovery focuses on specific data categories rather than full file-system restoration.
Continuing to use the drive after data loss is the biggest error
The most damaging one happens before Disk Drill is even open: continuing to use the drive. macOS writes to a volume for all sorts of reasons — Spotlight indexing, swap files, thumbnail caches, sleep images. Every one of those writes can land on sectors that still held the file you wanted. If you notice a deletion, eject the drive or shut the Mac down, then boot back up only when you are ready to scan.
A second mistake is recovering files onto the same volume they were deleted from. Disk Drill will let you do it, but each recovered file can overwrite other recoverable data still sitting on the drive. Always set the recovery destination to a different physical disk, not just a different folder on the same volume. An external USB drive works well, and so does a second internal partition on a separate disk.
Beginners also tend to stop at the first scan result. A quick scan finds directory entries that still exist; a deep scan reads raw sectors and builds files from signatures. On a formatted or badly damaged volume, the quick scan often comes back nearly empty. Let the deep scan finish before you decide whether recovery is possible. It takes longer — sometimes hours on a multi-terabyte drive — but skipping it is a common reason people conclude their files are gone when they are not.
Finally, some users assume every previewed file will recover intact. Preview proves that a file header and some content were found; it does not guarantee the whole file is contiguous or undamaged. Large videos and multi-gigabyte archives are the usual casualties. That is not a Disk Drill limitation — it is the nature of sector-level recovery on a drive that has seen new writes.
No section text to rewrite
The scan finds thousands of files with generic names
Deep scans rebuild files from content signatures, so the original filename is often gone. Files come back as file001.jpg, file002.jpg, and so on. Use the preview pane to identify what matters, then recover only those. The duplicate finder can also help you winnow a huge recovery set down to unique files before you copy anything.
Disk Drill cannot see the drive
Check that the drive appears in Disk Utility first. If macOS itself does not see the device, Disk Drill will not either. Try a different cable, port, or enclosure — many "dead" drives are perfectly fine inside a faulty USB bridge. If the drive appears in Disk Utility as uninitialized, do not initialize it. That writes a new partition table and makes recovery harder. Scan it as-is.
The app stalls during a byte-to-byte backup
Byte-to-byte DMG creation is the safest first step for a failing drive, but it stalls easily on read errors. Let it sit before you cancel; Disk Drill retries bad sectors and fills unreadable blocks with zeros. If it is completely stuck for a long stretch, the drive may be failing mechanically, and a recovery lab is the better route.
Permissions errors after the install
Because of the way the app is distributed, macOS Gatekeeper sometimes blocks the first launch. The install notes cover this: mount the disk image, run the Open Gatekeeper friendly command, press Enter in Terminal, then drag the app into Applications. After that, launch it normally.
Enable byte-to-byte backups before scanning a failing drive
Before your first real recovery, open the preferences and take a look at the scan and recovery defaults. A few changes make the workflow noticeably smoother:
- Enable byte-to-byte backups before scanning. For any drive you suspect is failing, this is the single most important setting. It creates a
.dmgimage of the entire device, then you scan the image instead of the original hardware. - Set a recovery destination that is not the source volume. Disk Drill remembers your last choice, so set it once to an external drive or a different internal disk and leave it there.
- Adjust preview quality. Lower preview resolution speeds up browsing through thousands of recovered photos on slower machines, especially older Intel Macs.
- Turn on the disk health monitor. It runs quietly in the background and flags SMART attributes that suggest a drive is on the way out — useful before a failure turns into a data-loss event.
- Check the file-type filters. If you only care about
.dngfiles from a camera card, filtering the scan down to raw photo formats cuts scan time and reduces noise in the results list.
How much manual work do you want to do versus PhotoRec?
Disk Drill sits in a crowded field on macOS. The closest alternatives are PhotoRec, R-Studio for Mac, and EaseUS Data Recovery Wizard. They all do sector-level recovery; they differ in how much manual work they expect from you.
PhotoRec is free and genuinely powerful, but it is a command-line tool with no preview and no device-health features. You recover everything to a folder and sort it out yourself. It is the right tool if you are comfortable with terminal work and want raw recovery without any interface overhead.
R-Studio for Mac is aimed at IT professionals. It has deeper RAID reconstruction tools and more granular hex-level editing, but the interface assumes you understand partition maps, file system structures, and recovery parameters. It is overkill for someone who just deleted a folder of photos.
EaseUS Data Recovery Wizard is the closest in day-to-day experience. The preview, scan, and recover flow is similar. Disk Drill's strengths against it are the breadth of mobile-device recovery — iPhone call history, contacts, and messages, plus Android support — and the extra tools like duplicate finding and disk health monitoring that make it useful before data loss happens.
For a mixed audience of regular users and support staff, Disk Drill 6 has the most balanced feature set. It does not go as deep as R-Studio for forensic work, and it is not as bare-bones as PhotoRec, but it covers the recovery cases most people actually hit.
A workflow: recovering a formatted SD card from a camera
Here is a start-to-finish run for a common scenario: an SD card was accidentally formatted in-camera, and the photos from a shoot need to come back.
- Remove the card from the camera immediately. Do not take new photos on it. Slide the write-protect tab to the locked position if the card has one, then insert it into a USB card reader connected to the Mac.
- Create a byte-to-byte backup. Open Disk Drill, select the SD card, and choose Byte-to-byte Backup. Save the
.dmgto your internal drive or an external disk. This preserves the current state of the card in case the card itself is failing. - Scan the backup image. Mount the
.dmgfile, then run a deep scan on it. Since the camera formatted the card, the file system is fresh and most recoverable photos will only surface through signature scanning. Let the scan run to completion. - Filter to photo formats. In the results, narrow the view to
.dng,.cr2,.nef,.jpg, and.m4aif video was captured alongside stills. The 6.3.2326 build handles.dngdetection better than previous releases, so raw files should appear if they are intact. - Preview and select. Work through the thumbnails and mark the photos that look right. Generic
file####names are expected after a format, so rely on the preview rather than filenames. - Recover to a different drive. Set the destination to a folder on your Mac's internal SSD or an external drive — anything except the SD card itself. Click Recover and let the copy finish.
- Verify the recovered files. Open a few
.dngand.jpgfiles in Preview or your normal photo editor. Check that the files open cleanly and that color and metadata look right before you reformat the card for reuse.
The whole process on a 64 GB card might take one to two hours, most of it deep-scan time. The byte-to-byte step is what makes the difference between a safe recovery and a gamble on a card that may be failing — it is worth the extra minutes every time.
- Detects and recovers lost BitLocker partitions.
- Adds support for
.p8and.pfxfiles. - Adds
.m4asupport in the ACR module. - Improves encrypted APFS partition handling.
- Fixes byte-to-byte DMG scanning.
- macOS 10.15.7 or later
- Runs on both Intel and Apple Silicon Macs
$ man disk-drill | grep -A2 "?"
Can Disk Drill recover data from a formatted drive?
Yes. It can restore data from formatted devices, though the chance of a clean recovery depends on how much new data has been written since formatting.
Which Apple devices does Disk Drill support for recovery?
It supports iPhone, iPad, and iPod, including recovery of call history, contacts, and messages on iPhone and iPad.
What is new in Disk Drill 6.3.2326?
The update adds detection and recovery of lost BitLocker partitions, support for.p8 and .pfx files, .m4a support in the ACR module, improved encrypted APFS handling, and a fix for byte-to-byte DMG scanning.
Comments 0
Sign in or create an account to leave a comment.
No comments yet. A codec, a slice, a machine — they appear after moderation.