Screen Studio for macOS
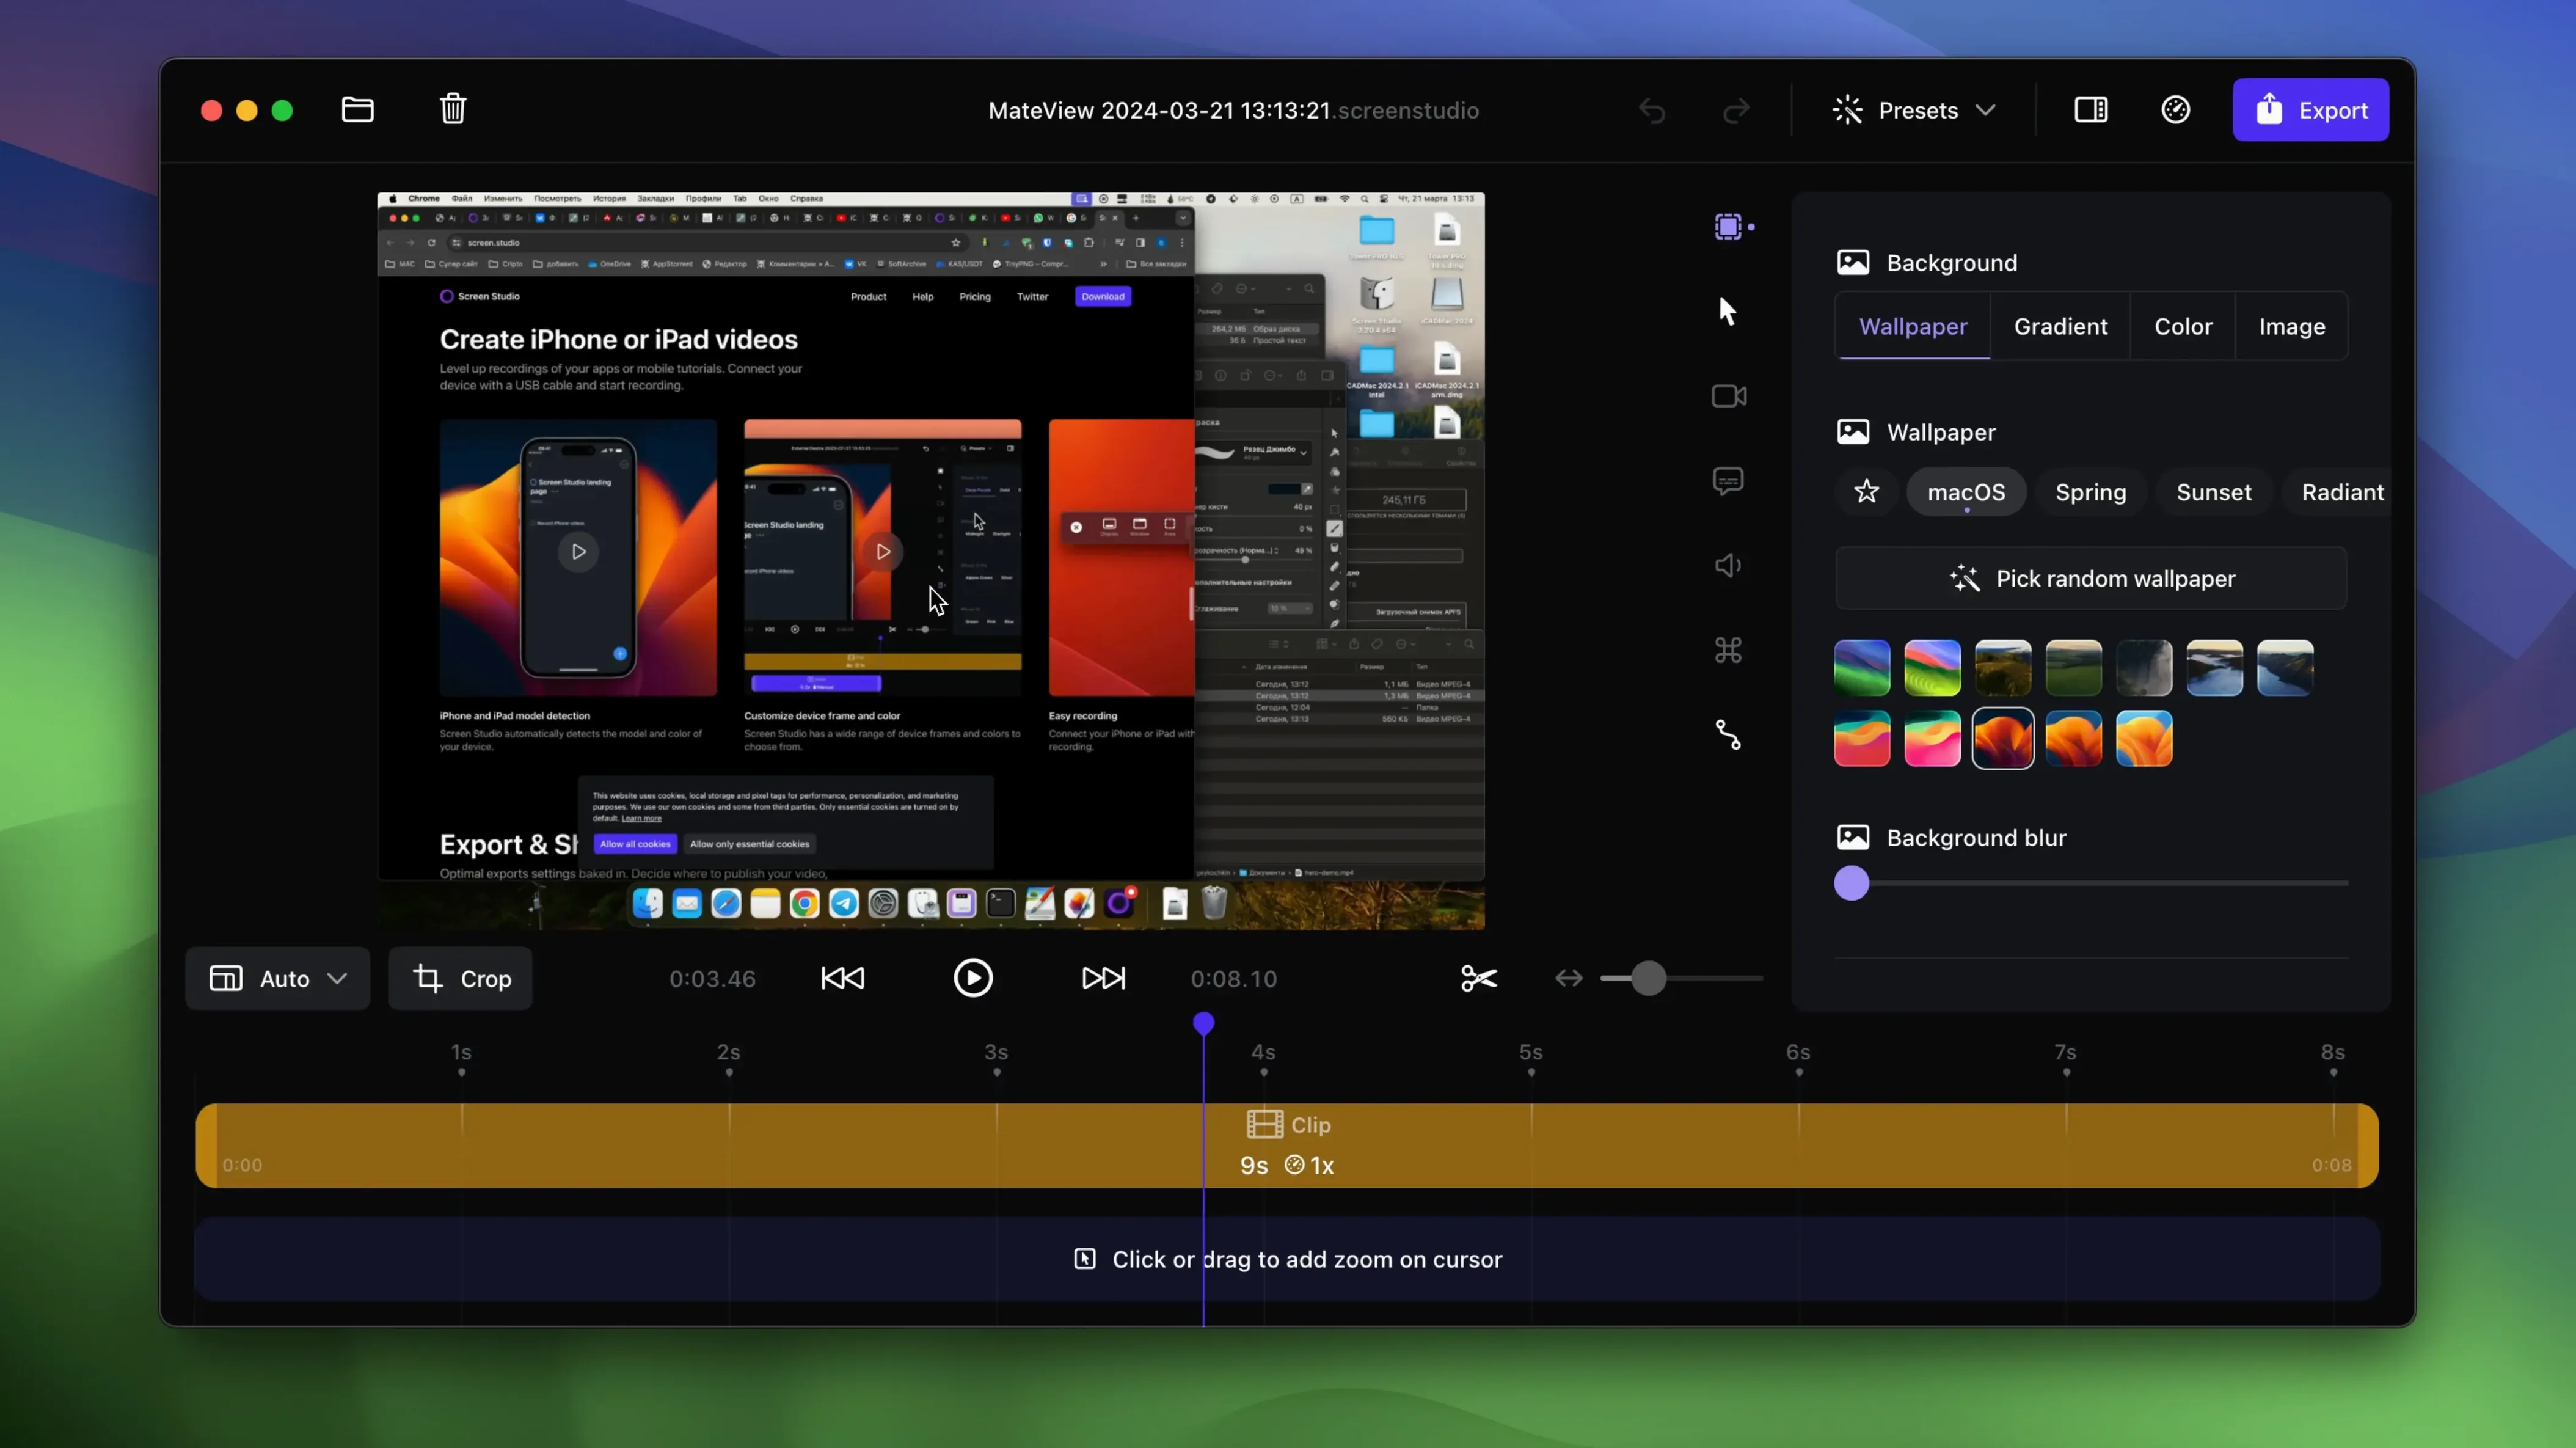
Screen Studio runs on any Mac with macOS 13 or later as a native application, compiled for Apple Silicon and Intel. It's a screen recorder built around a specific idea: you do the talking and mousing, and it adds the kind of automatic zoom and cursor polishing that normally takes an editing pass. The current version, 3.7.5-4595, concentrates on that core loop—everything is about capturing and exporting with the polish baked in.
- Zoom edits can be handled on the timeline by dragging them. No keyframes to set manually.
- Cursor size is changeable after the recording is done, so you can make it more prominent without a re-shoot.
- A cursor looping feature can move the pointer back to its starting position near the end of the video, which makes it easier to create clean loops for
.gifexports. - Export targets include regular video and
.giffiles. Vertical export is supported, and the app adjusts the scaling to fit that format without pillarboxing. - A selfie overlay can be added and automatically shown at a reduced size to keep the focus on the screen content.
The feature set hasn't shifted in this build—there are no specific new items listed—so it is the same mixed recording pipeline it has been: screen, webcam, mic, and system audio are all available as sources, and you can generate a shareable link straight from the app once a video is finished.
Turning off system audio scope so it doesn't feel like a mystery box
The defaults are sensible for a quick demo, but a few switches make the tool feel less like a mystery box the first time you record something real.
- System audio scope. By default, Screen Studio can grab system audio from every app. In the recording preferences, narrow it to only selected apps if you're capturing a browser tab and don't want Slack pings baked into the track. It saves a trip to a separate audio editor later.
- Desktop icon auto-hide. Tucked away in the preferences is a toggle that hides desktop icons during recording and restores them afterward. Turn it on before you record a client walkthrough—nobody needs to see your
Untitled Folder 47. - Keyboard shortcut display. The app can overlay the keys you press directly in the recording. It's off by default. Flip it on if you're teaching keyboard-driven workflows; the overlay appears near the bottom edge and doesn't fight the automatic zoom.
- Noise removal and voice normalization. Both are one-click toggles in the audio section. If your room has a low hum or you tend to drift closer and farther from the mic, enable both before the first take. The processing runs locally, so there's no upload delay.
- Default export format. The export panel remembers your last choice, but the very first time it may default to a resolution lower than your recording. Bump it to 4K at 60 fps in the export preset if your source material justifies it; the app won't upsample, but it will keep the full frame if the setting matches.
Why fighting the automatic zoom during recording backfires
Most of these come from treating Screen Studio like a generic screen recorder. It isn't—it's making decisions about framing and motion while you record, and a few habits trip people up.
- Fighting the automatic zoom during recording. The engine zooms toward mouse clicks and UI changes. Beginners sometimes jerk the cursor back to "correct" the framing, which gives the motion tracker two conflicting targets. Let the zoom settle. You can drag zoom regions on the timeline afterward if it guessed wrong.
- Recording system audio through the microphone. If you want clean app sound, select system audio as a source. Pointing the microphone at your speakers and hoping for the best produces a hollow, room-colored track that noise removal can't fully rescue.
- Forgetting to check the connected-device model detection. When you plug in an iPhone or iPad via USB, Screen Studio detects the model and color to frame the device bezel correctly. If you connect the cable after starting the recording session, it sometimes falls back to a generic frame. Plug in first, then open the recording panel.
- Exporting a
.gifwithout trimming the timeline first. The.gifexporter respects the full timeline. A 45-second recording at 60 fps makes a huge, stuttering file. Cut the range down to a few seconds and consider dropping the frame rate in the export dialog before writing the.gif. - Leaving the selfie overlay at full size for a tutorial. The overlay shrinks automatically, but if you manually resized it earlier and forgot, it can dominate the frame. A quick check before hitting record avoids re-shooting a five-minute walkthrough.
- Ignoring the clipboard export path. New users often render a full video file just to drop it into a Slack thread or a Notion page. The copy to clipboard option writes a video directly to the pasteboard, ready for pasting. It's faster and doesn't leave a file you'll delete later.
Cursor looping got smoother without a feature flag
With version 3.7.5-4595, no fresh feature flags appeared in the changelog, but a few refinements from recent builds have settled into the daily rhythm of the app.
The cursor looping behavior is smoother than it was a few point-releases ago. Where earlier builds sometimes snapped the pointer back to its origin abruptly, the current version interpolates the return path so the loop closes without a visible teleport. If you make short .gif demonstrations—hovering over a button, clicking, and looping back—this matters every time.
Vertical export scaling now respects the source aspect ratio more carefully. When you switch to a 9:16 output, the automatic reframing keeps the zoomed region centered on the action rather than cropping from the top-left corner. For anyone posting to Shorts or Reels, that means fewer manual adjustments in the timeline before export.
The local transcript generation has gotten faster on Apple Silicon machines. It's still an on-device process, but the model runs with less warm-up time than it did in the 3.5 series, so clicking "generate transcript" after a five-minute recording feels nearly instant instead of a coffee-break wait.
On the audio side, the background noise removal algorithm no longer attenuates the tail end of quiet syllables as aggressively. Earlier versions occasionally clipped the decay of a soft "s" or "f" when the room tone was loud; the current build leaves those edges intact, which makes the normalization step sound less processed.
Recording a two-minute feature demo in fifteen minutes
Let's walk through a real scenario: you need to record a two-minute feature demo for a colleague, showing how a new search filter works in your web app. You want the video to look polished but you have fifteen minutes, not an hour.
First sixty seconds. You plug in your USB microphone and check that macOS sees it. You open Screen Studio and glance at the recording panel. System audio is set to selected apps only because you did that once and it stuck; you add your browser to the list. You toggle keyboard shortcut display on—the demo involves a Cmd-K shortcut, and you want it visible. Desktop icon hiding is already enabled from the last session.
Recording. You hit record and wait for the three-second countdown. You open the browser, narrate as you go—"click the filter bar, type 'priority: high', hit Enter"—and move the mouse deliberately. The automatic zoom pushes in on the filter bar when you click it, then pulls back when you scroll to the results. You don't fight it. You finish the walkthrough, click stop, and the recording appears on the timeline.
Quick edits. You drag the start and end markers to trim the dead air at the beginning and the fumble at the end. There's a moment where the zoom lingered on an empty part of the sidebar. You grab that zoom region on the timeline and nudge it two seconds earlier so it lands on the filter dropdown instead. The cursor looks a little small on this 1440p recording—you bump the cursor size slider up by a few points and toggle the static-cursor auto-hide so it fades when you're talking and not moving the mouse.
Selfie overlay. You recorded the webcam, and the overlay is sitting at the default reduced size in the bottom-right corner. It works, but it covers a button in the last ten seconds. You drag the overlay to the bottom-left for the entire timeline with one adjustment; the automatic size reduction keeps it unobtrusive.
Audio cleanup. You enable voice normalization and background noise removal. A quick playback of the first thirty seconds confirms the hum from your desk fan is gone and your voice sits at a steady level even when you leaned back mid-sentence.
Export. The video is destined for a shared company folder, not social media, so you keep the horizontal 16:9 layout. You choose 4K, 60 fps from the export presets, name the file search-filter-demo, and let it render. While it writes the .mp4, you click the shareable-link button to generate a URL you can paste into Slack as a backup. Thirty seconds later the file is on your desktop and the link is in your clipboard.
Total elapsed time: about twelve minutes. Nobody opened a traditional video editor, and the automatic zooms did the heavy lifting that normally takes manual keyframing.
- macOS 13 or later
- Apple Silicon or Intel 64‑bit Mac
$ man screen-studio | grep -A2 "?"
Can I record a connected device with Screen Studio?
Yes. The app can capture from your Mac's screen or from a connected device, which works well for recording iOS or iPadOS screen demos.
Can I adjust the zoom animations after recording?
Yes. You can edit zoom changes by dragging them around directly on the timeline inside the app.
Comments 0
Sign in or create an account to leave a comment.
No comments yet. A codec, a slice, a machine — they appear after moderation.